Coffee Above the Clouds

Welcome to a practical, flavorful journey into brewing coffee at high altitude in mountain camps and huts. Thin air changes boiling points, extraction timing, and even how your gear behaves. Here you’ll master simple adjustments, pack-smart equipment choices, and field-tested routines that turn cold dawns into warm memories. Share your own tricks, ask questions, and subscribe for more trail-friendly wisdom brewed above the treeline.

What Altitude Does to Water and Flavor

High places reshape your cup. As atmospheric pressure drops, water boils at lower temperatures, slowing extraction and muting sweetness. Yet clarity and aromatics can shine with patient technique. Learn how to lengthen contact time, refine grind, and manage heat so your campsite kettle delivers balanced, confident brews despite icy winds, restless stoves, and that palpable hush you only hear when mountains surround your morning.

Boiling Point, Pressure, and Practical Temperatures

Expect cooler water at a boil: around 93°C near 2,000 meters and closer to 90°C by 3,000 meters, depending on weather and pressure. Since extraction slows, compensate with slightly finer grinds and longer brews. Use insulated kettles, lids, and preheated mugs to preserve precious heat. Track consistency across days, because shifting barometers and wind exposure can nudge your process more than you might guess.

Bloom Behavior and Degassing in Thin Air

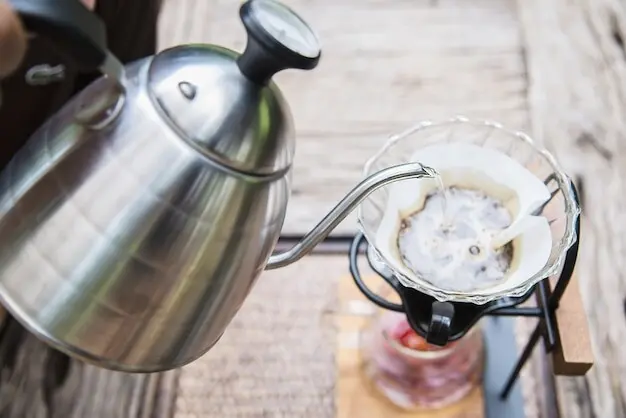
Lower pressure encourages lively blooms, while cold air cools slurry quickly, fighting that vigor. Let fresh coffee bloom longer—forty-five to sixty seconds—and stir gently to release trapped gas evenly. Pre-wet paper filters thoroughly so swelling fibers don’t siphon heat. Watch the dome of bubbles as a guide: exaggerated bubbling may mask under-extraction, so resist rushing, pour slowly, and protect the cone with a windscreen or jacket.

Tuning Acidity, Sweetness, and Body

Altitude can spotlight acidity while hiding sweetness if extraction lags. To restore harmony, pair modestly finer grind settings with intentional agitation and slightly extended contact time. Choose ratios that invite body, like 1:15 for immersion or a thoughtful bypass for clarity without thinness. Taste repeatedly as your kettle cools; cooler sips can reveal whether your adjustments lifted caramel notes or left flavors stranded among chilly, underdeveloped edges.

Choosing Reliable Gear for Camps and Huts

Collapsible cones and lightweight plastic drippers handle bumps, frost, and hurried packing. Pair them with sturdy paper filters and a compact gooseneck or spouted kettle for steady pours despite shivering hands. Pre-wet filters generously to mitigate heat loss. Use a windscreen, lower the flame, and pour in patient pulses. A simple cone, a good filter, and a warm mug can rescue a gray, wind-battered morning.
Immersion brewers forgive unstable flames and cooler water, rewarding patience with heft and comfort. Choose metal or durable plastic walls to hold heat, and pack a fine metal mesh or secondary screen to tame silt. Extend steep time thirty to sixty seconds at altitude, then press smoothly. Preheating the vessel and cup can transform a lukewarm outcome into a steadier, velvety pour that revives frozen fingers.
Moka pots depend on pressure differentials that thin air complicates. Use water preheated just off the boil, grind slightly finer than usual, and keep the flame modest to avoid scorching. Replace worn gaskets before departure. If sputtering or weak flow appears, back off heat, reseat components, and try a touch coarser. End the brew early when blonding begins, then wrap the base in a damp cloth to halt overcooking.

Water, Heat, and Fuel Management in Thin Air

Conserving heat is everything above the treeline. Lower boiling temperatures and biting winds conspire to strip energy from kettles and cups. Shield your stove, insulate your pot, and stage your workflow. When snowmelt is your source, treat it with respect and patience. Plan fuel ruthlessly, because gusts and simmering adjustments devour canisters faster than sea-level routines ever suggest. Precision now earns sweeter, steadier coffee later.

Fuel Planning and Windscreen Discipline

Altitude often raises fuel use; cold can goose it further. Carry extra canisters or white gas, and use a windscreen that leaves safe clearance for ventilation. A regulated stove offers steadier output in cold. Keep lids on, avoid needless boils, and consolidate brewing rounds for groups. Tiny efficiencies—warming water for multiple cups, staging mugs in a cozy—add up to serious savings when storms stall your timeline.

Temperature Curves and Heat Retention

With cooler boiling points, treat every captured degree like gold. Preheat brewer, filter, mug, and even your spoon. Keep the kettle covered between pours. If your pour-over stalls because slurry temperature nosedives, move closer to the flame’s shelter or pour smaller, more frequent pulses. An insulated bottle holding near-boiling water can serve as a backup heat reservoir, stabilizing bloom stages and late-stage rinses when winds punish patience.

Snowmelt, Filtration, and Boiling Guidance

Fresh snow can taste bright but may carry contaminants after windstorms. Filter first, then boil. At elevations above roughly 2,000 meters, extend a rolling boil to three minutes for safety. Avoid letting wet filters freeze; stash them inside your jacket. Use wide-mouth bottles for treatment workflow, label clean versus dirty sides, and keep your brew gear away from dishwater zones to prevent accidental cross-contamination on crowded hut benches.

Pour-Over: Calm Pours and Longer Contact

Aim for a slightly finer grind than sea-level settings, generous bloom of forty-five to sixty seconds, and slower pulses that keep the bed evenly saturated. Try a 1:16 ratio, lengthening drawdown by twenty to forty seconds. Protect the cone from wind with a lightweight shield. If flavors taste thin, tighten grind one notch, extend bloom, and agitate gently once mid-brew to coax sweetness without muddying clarity.

Immersion: Reliable Warmth and Comfort

Immersion resists environmental swings by sheltering slurry. Start near 1:15, increase steep by thirty to ninety seconds, and insulate the brewer with a sleeve or scarf. Stir once at the start, then again before pressing to equalize extraction. If bitterness creeps in, coarsen slightly or shorten contact time. For groups, split batches into preheated mugs rather than waiting, keeping momentum—and morale—high as clouds scrape the ridgeline.

Aeropress: Compact Control in Cramped Quarters

Use the inverted method to preserve heat, bloom forty seconds, then steep two to three minutes before a steady press. Grind finer than drip yet coarser than espresso. Consider a paper plus metal filter stack for cleaner cups without losing body. If extraction feels shy, extend steep or adopt a moderate stir pattern. Aeropress packs small, cleans easily, and turns a rickety hut table into a miniature coffee lab.

Beans, Roasts, and Grinding for the High Country

Colder, gentler water needs beans that surrender flavor willingly. Medium to medium-dark roasts often shine, offering accessible sweetness when extraction slows. Naturals and well-developed washed lots can both succeed with thoughtful tweaks. Hand grinders become ritual; alignment and burr quality matter when your gloves are off and wind needling your patience. Protect freshness in portioned bags, and expect to adjust two clicks finer as snow swirls outside.

Selecting Roasts That Shine When Water Runs Cool

If your high-altitude cups taste pale, try roasts with slightly deeper development to boost solubility and caramel sweetness. Avoid extreme darkness that collapses nuance, unless comfort trumping complexity is the mission. Fruity naturals can pop beautifully with longer blooms. Washed Central Americans reward careful agitation. Pack small samplers, test a cup each morning, and note which profiles overcome thinner air without sacrificing your preferred balance of sparkle and body.

Grind Size, Consistency, and Micro-Adjustments

Bring a solid burr grinder with clear, repeatable clicks. Start at your sea-level setting, then go one or two clicks finer to compensate for cooler brewing temperatures. Watch flow: if it races, you likely need finer; if it stalls, coarsen. Tap the brewer to settle fines evenly. In prolonged cold, grind inside your jacket to preserve hand dexterity. Log settings with altitude and weather so future trips dial faster.

Rituals, Safety, and Shared Moments in Remote Shelters

Mountain coffee is as much about people as extraction curves. Early light, boot clatter, stove hiss, and the hush before first sips stitch friendships quickly. Respect shared spaces, manage flames carefully, and watch ventilation. Carbon monoxide is silent, so crack windows and use stoves responsibly. Offer a refill, trade a story, teach a technique, and make space at the bench; the brew tastes sweeter when generosity circulates freely.

Troubleshooting When the Air Gets Thin

Sour cups, bitter stalls, sputtering moka pots, and sudden filter blowouts happen more often far from sea level. A structured checklist restores calm: examine grind, time, agitation, heat retention, and ratio—then change one variable at a time. Track results in a pocket notebook. Embrace iteration; mountains reward patience. Share your fixes in the comments so the next hiker’s morning begins brighter than the frosty night before.
Siralororinopexidavomira
Privacy Overview

This website uses cookies so that we can provide you with the best user experience possible. Cookie information is stored in your browser and performs functions such as recognising you when you return to our website and helping our team to understand which sections of the website you find most interesting and useful.